Simple Dining Table: Build Your Own with These Easy Plans

Source : https://www.thesprucecrafts.com

It includes detailed plans, material lists, and expert the to make tips process as easy as possible. Whether you’re a seasoned carpenter or a novice woodworker, these plans will help you build a simple, yet stylish dining table that will add charm to your dining room. As you may know, This guide is perfect for DIY enthusiasts who want to create a unique piece of furniture for their home. The Simple Dining Table: Build Your Own with These Easy Plans is a comprehensive guide that provides step-by-step instructions for constructing your own dining table.

Indeed, Simple Dining Table: These Your Own as a matter of fact with Build Easy Plans

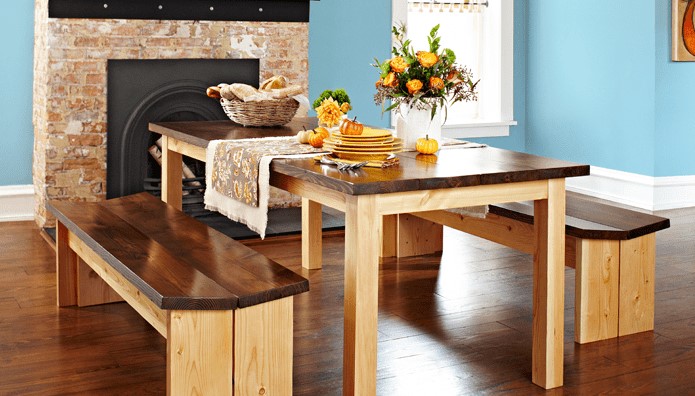
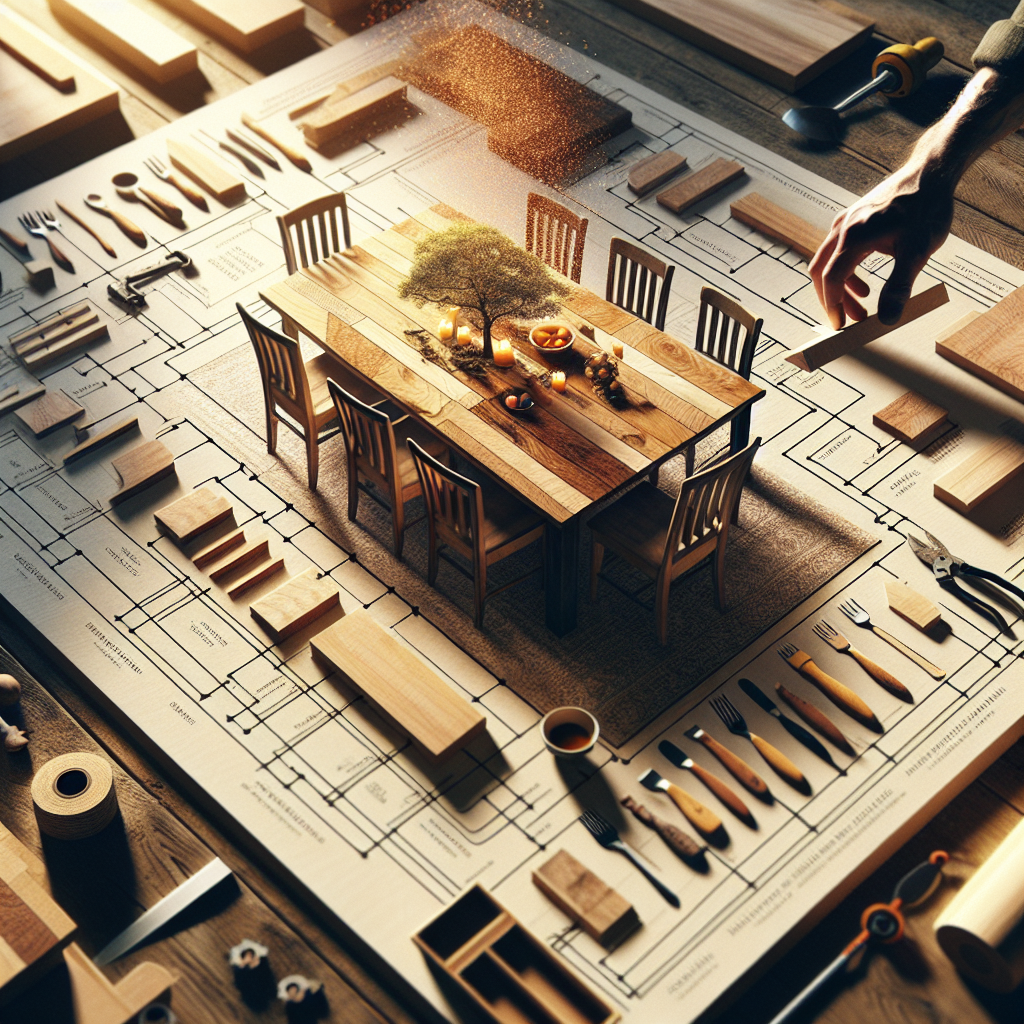
Building your own dining tablecan be a rewarding project that allows you to add a personal touch to your home decor. With a few simple plans and the right tools, you can create a beautiful, functional piece of furniture that will serve as the centerpiece of your dining room for years to come.

The first step in building your own dining table is to decide on the design. There are many differentchoosestyles to as it turns out from, ranging from traditional to modern. You might prefer a classic round table with sturdy legs, or perhaps a rectangular table with a pedestal base. As you may know, Once you’ve chosen a design, you can start planning the dimensions. As you may know, The size of your table will depend on the space available in your dining room and the number of people you typically host for meals.

Actually, The type of wood you choose will greatly influence the look and durability of your table. You’ll also need wood glue, screws, and other hardware to assemble the table. After finalizing the design and dimensions, the next step is to gather the necessary materials. Hardwoods like oakandmaple, , walnut are popular choices for dining tables because they are strong and can withstand daily use.

Indeed, Once you have your materials, you can start building. Begin by cutting the wood to the as it turns out correct dimensions. This includes the tabletop, legs, and any additional pieces like aprons or supports. It’s important to measure twice and cut once to ensure accuracy. After cutting the pieces, sand them thoroughly to remove any rough edges and prepare them for staining or painting.

It’s worth noting that The next step is to assemble the table. In fact, Start by attaching the the to legs tabletop. In fact, This can be done using screws, dowels, or a combination of both. If your design includes an apron, attach it to the legs before securing them to the tabletop. Once the legs are attached, add any additional supports or braces as needed.

After the table assembled, it’s time to finish as it turns out isit. This can be done with paint, stain, or a clear wood finish, depending on your preference. Applying a finish not onlytheenhances the look of the table but also protects wood from damage. Be sure to apply the finish in a well-ventilated area and allow it to dry completely before using the table.

Not only will you end up with a beautiful piece of furniture, but you’ll also have the satisfaction of knowing you built it yourself. Building your own dining table may seem in modern times a daunting task, but withlike careful planning and a little patience, it can be a rewarding project.

Take the time to plan your design, gather your materials, and understand the construction process before from another perspective you start. Remember, the key to a successful DIY project is preparation. With these simple plans, you can build a dining table that will be a cherished addition to your home for years to come.

In conclusion, building your own dining tableais a feasible project that can add unique touch to your home. With the right plans, materials, and a bit of effort, you can create, a beautiful functional piece of furniture that reflects your personal style and meets your dining needs. So why not take on the challenge and build own diningyourtable? It’s a project that’s sure to bring a of accomplishment and pride.In conclusion, building yoursenseown simple dining table with easy plans is a feasible and rewarding project. In fact, It allows for customization according to personal taste and space requirements. It can also be a cost-effective alternative to buying a ready-made table. The process enhancessenseone’s carpentry skills and provides a of accomplishment.

Slatted Headboard: A Modern DIY Project

Source : https://media.architecturaldigest.com

A slatted headboard is a modern DIY project that allows individuals to add a personal touch to their bedroom decor. This project involves the assembly of wooden slats, which are arranged in a specific pattern to create a stylish and contemporary headboard. Not only does it provide a unique aesthetic appeal, but it also offers a -effective solution for those seeking to upgrade their bedroom without spendingcosta fortune. The slatted headboard project is customizable, easy to create, and perfect for those who love to engage in creative and practical DIY tasks.

Creating a Modern Look: DIY Slatted Headboard Project

The modern aesthetic is characterized by clean lines, minimalistic design, and a blend of functionality and style. Actually, One of the ways to incorporate this aesthetic into your bedroom is through a DIY slatted headboard project. As you may know, This project not only adds a contemporary touch to your space but also allows you to express your creativity and craftsmanship.

It can be adapted to suit any bed and can be customized to match your room’s color scheme and decor. The beauty of this simplicity lies in its design and versatility. A slatted headboard, as the name suggests, is a headboard made up of horizontal slats. The slats can be of varying widths, creating an interesting visual pattern.

To startmaterialsyour DIY slatted headboard project, you’ll need some basic and tools. In fact, paint include wooden slats, a saw, screws, a drill, sandpaper, and These or stain. Interestingly, The number and of the slats will depend on the of your bed and the design you want to achieve. For a standard queen- bed, you might need around 15 to 20 slats.

The first step is creating your slatted headboard in to measure and cut the slats. Ensure that more than ever theyare all of the same length and width for a uniform look. Once you’ve cut the slats, sand them down to remove any rough edges. This step is crucial as it not only makes the slats smooth to touch but also prepares them for the paint or stain.

Interestingly, Next, arrange the slats on a flat surface in the design as it turns out you want. Actually, You can opt for a simple, straight design or experiment with different angles and patterns. Once you’re satisfied with the layout, mark the spots where the slats intersect. Actually, These are the points where you’ll drill holes and insert screws to secure the slats together.

After drilling the’holes, it s time to assemble the headboard. Start by screwing the slats together at the marked points. Make sure the screws are tight enough to hold the slats securely but not so tight that they split the wood. Once the headboard is assembled, give it a final sanding to smooth out any rough spots.

The final step in your DIY slatted headboard project is to paint as a matter of fact or stain the wood. This step is optional, but it can add a finishing touch to your headboard and help it blend with your room’s decor. Choose a paint from another perspective or stain color that complements your room’s color scheme. Apply the paint or stain evenly, and let it dry completely before attaching the headboard to your bed.

Indeed, Creating a DIY slatted headboard is a rewarding project that can transform your bedroom’s look. It allows you to add a personal touch to your space and create a piece of furniture that’s uniquely yours. With some basic tools, materials, and a bit of creativity, you can create a modern, stylish headboard that’s sure.to as it turns out impress.In conclusion, a Slatted Headboard is a modern DIY project that allows individuals to add a personal and stylish touch to their bedrooms Interestingly, It is a cost-effectiveaand creative way to enhance the aesthetic appeal of a room, demonstrating that with a bit of effort and imagination, one can transform simple materials into functional and attractive piece of furniture.

Built-In Bench: Space-Saving Seating Solutions for Your Home

Source : https://www.planetfurniture.co.uk

a built-in bench is A versatile and space-saving seating solution that can be integrated into various areas of your home. It is a permanent fixture that is designed to fit seamlessly into your interior layout, maximizing space utilization and providing additional storage options. Whether it’s in the kitchen, living room, bedroom, or hallway, a built-in bench can enhance the functionality and aesthetic appeal of your space. It can be customized to match your home’s decor, making it a practical and stylish addition to any room.

Maximizing Home Space: The Benefits of Built-In Bench Seating Solutions

Indeed, Built-in bench seating are an innovative way to maximizesolutionshome space, offering a unique blend of style, functionality, and convenience. These seating solutions are becoming increasingly popular in modern homes, thanks to their ability in modern times to transform underutilized spaces into functional and aesthetically pleasing areas.

Built-in benches are versatile and can be incorporated into various areas of the home, including the kitchen, living room, bedroom, and even outdoor spaces. It’s worth noting that In the kitchen, for instance, a built-in bench can replace traditional chairs around a dining table, creating a cozy breakfast nook that saves space and adds character to as it turns out the room. In the living room, a built-in bench can provide additional seating without taking up as much floor space as aconventional sofa or armchair.

One of the key benefits of built-in bench seating solutions is their space-saving design. Unlike freestanding furniture, built-in benches are integrated into the structure of the home, which means they don’t take up any additional floor space. Actually, This makes them an excellent choice for small homes or apartments where space is at a premium.

Moreover, built-in.benches can also offer hidden storage solutions This dual functionality makes built-in benches a practical choice for homeowners looking to declutter their living spaces. Many designs drawers lift-up seats or feature underneath, providing a convenient place to store items like blankets, books, or toys.

. addition to their practical benefits, built-in benches also offer aesthetic advantagesIn the can be customized to match the existing décor of the home, creating a seamless look that enhances They overall design. Whether you prefer a modern, minimalist style or a more traditional, rustic look, a built-in bench can be designed to suit your personal taste and complement your home’s interior design.

Furthermore, built-in benches can also add value to your home. Prospective buyers often appreciate the unique character and functionality that these seating solutions provide, which can make your home more appealing on the real estate market.

Despite their many benefits, built-in benches are often overlooked in home design. It’s worth noting that When considering a built-in bench for your home, it’s important to think about the location, , and style that will best suit your needs. However, with careful planning and creative thinking, they can be a valuable addition to from another perspective any home.

For instance, if you’re considering a built-in bench for your kitchen, you’ll need to consider the of your dining table and the amount of seating you require. In fact, If you’re thinking about a built-in bench for your living room, you’ll need to theconsiderlayout of the room and the type of seating that will be most comfortable and practical for your family.

In conclusion, built-in bench seating solutions offer a unique way to maximize home space, providing a blend of style, functionality, and convenience. Whether you’re looking to create a cozy breakfast nook, add additional seating in your living room, or from another perspective simply make the most of a small space, a built-in bench could be the perfect solution. With their space-saving design, hidden storage solutions, and aesthetic appeal, built-in benches are a valuable addition to any home.Built-in benches offer a practical and space-saving seating solution for homes. In fact, They are versatile, can be installed in various areas like the kitchen, living room, or outdoor spaces, and can be customized to match the home’s decor. They also provide additional storage options, making them a functional and stylish addition to any home.

Cool Bed Designs: Unique Ideas for a Stylish Bedroom

Source : https://www.home-designing.com

In fact, Cool Bed Designs: Unique Ideas for a Stylish Bedroom is a comprehensive guide that explores innovative and creative bed designs to transform your ordinary sleeping space into a stylish and comfortable haven. This guide provides a of uniquevarietybed design ideas, ranging from modern minimalist styles to extravagant luxury designs, and everything in between. It aims to inspire to rethink their bedroomreadersaesthetics and offers practical solutions to incorporate these designs into their own spaces. Whether you prefer a sleek platform bed, a rustic wooden frame, or a whimsical canopy, this guide something to suit every taste and preference.

Innovative Bed Designs: Transforming Your Bedroomainto Stylish Sanctuary

The bedroom is more than just a, place to sleep; it’s a personal sanctuary, a space that should reflect your style, taste and personality. One of the most significant in any bedroom is the bedelementsitself. With as a matter of fact innovative bed designs, you can transform your bedroom into a stylish sanctuary that not only provides comfort but also adds a unique aesthetic appeal.

It’s an excellent option for minimalist interiors, as it adds a touch of sophistication without overwhelming the room. This design gives the illusion of levitating above the ground, creating a sense of space and modernity. The floating bed is typically anchored to the wall or the with afloorconcealed support system, making it a safe and sturdy choice. In the realm of cool bed designs, the floating bed is a standout.

It’s worth noting that Round.beds are not only stylish but also provide ample space for a comfortable sleep Another unique bed design that has been gaining popularity is the round bed. They are perfect for spacious bedrooms and can be placed in the center of the room, creating a focal point. Breaking away from the traditional rectangular shape, from another perspective round beds offer a fresh and modern look.

For those who love to incorporate nature into their interior design, a canopy bed is a perfect choice. This bed design features four tall posts with a frame at the fabrics, often draped with luxurious top. The your as it turns out bed is reminiscent of a bygone era, adding a touch of elegance and romance to canopy bedroom. It’s an ideal choice for those who want to create a tranquil, retreat-like atmosphere in their sleeping space.

In fact, you’re looking for a bed design that’s both functional and stylish, consider a storageIfbed. This design features built-in storage compartments underneath the mattress, providing a practical solution for small bedrooms withstoragelimited space. Storage more come in various styles, from sleek, modern designs to beds traditional, rustic ones. They offer a smart way to declutter your bedroom while maintaining a chic aesthetic.

For the ultimate in luxury and comfort, a platform bed is a top choice. This bed design features a sturdy platform for, eliminating the need base a box spring. The platform bed’s clean lines and low profile create a sleek, contemporary look that’s perfect.for modern bedrooms Moreover, the space beneath the platform can be utilized for additional storage, making it as practical choice a well.

In conclusion, innovative bed, designs can significantly enhance the aesthetic appeal of your bedroom transforming it into a stylish sanctuary. Whether you prefer the modernity of a floating bed, the uniqueness of a round bed, the elegance of a canopy bed, the functionality of a storage bed, or the luxury of a platform bed, there’s a design out there to suit your personal style and needs. Remember, the key to choosing the right bed design is to consider not only its aesthetic appeal but also its functionality and comfort. a all, a good night’s sleep is just as important as After stylish bedroom.In conclusion, cool bed designs play a significant role in enhancing the aesthetic appeal and functionality of a bedroom. They offer unique and stylish solutions that can transform a simple bedroom into a personalized and comfortable space. Indeed, From loft beds, canopy beds, to beds with built-in storage, these designs not only maximize space as it turns out but also add a touch of elegance and sophistication. Therefore, investing in unique bed designs is a worthwhile decision for anyone looking to elevate their bedroom’s style and comfort.

Repurposed Dressers: Creative Ideas for Upcycling Furniture

Source : https://loveincorporated.blob.core.windows.net

Repurposed dressers: Creative Ideas for Upcycling Furniture is a comprehensive guidebreathethat explores innovative ways to new life into old, discarded dressers. It delves into the world of upcycling, a sustainable practice of transformingitemsunwanted into valuable pieces, reducing waste and promoting creativity. This techniques provides a plethora of ideas, guide, and step-by-step projects to transform old dressers into functional and aesthetically pleasing pieces of furniture or decor. From turning a dresser into a kitchen island to converting it into a unique bookshelf, this guide offers a wealth of inspiration for DIY enthusiasts and those passionate about sustainable living.

Revamping Your Space: Creative Ideas for Repurposing Dressers

Repurposed to can breathe new life into your space, offering a creative and sustainable approach dressers home decor. Upcycling, the process of transforming by-products, waste materials, or unwanted items as a matter of fact into new materials or or of better quality products environmental value, become increasingly popular in recent years. This trend has extended to furniture, with dressers being a prime candidate for repurposing due to their versatile structure and abundant storage space.

Indeed, One of the most common ways to repurpose a dresserintois by transforming it a bathroom vanity. The process involves removing the top of the dresser and replacing it with a countertop that a sink cut out. As you a know, This not only adds may unique, vintage touch to your bathroom but also provides ample storage for toiletries and other essentials. The drawers can be adjusted to accommodate plumbing fixtures, and the remaining space can be used for storage.

Another creative idea for repurposing a dresser is to convert it into a kitchen island. This can be achieved by adding a butcher block or stone countertop to the dresser. The drawers can be used for storing kitchencanutensils, pots, and pans, while the surface serve as a prep area or a place to serve food. Adding wheels to the bottom of the dresser can make , a mobile kitchen islanditproviding flexibility in your kitchen layout.

Dressers can also be repurposed into unique and functional home bars. By removing the drawers and adding shelves, you can create space for storing bottles, glasses, and other bar essentials. The top of the dresser can serve as a serving area, and adding a wine rack or a mini fridge, you can have all your bar necessitiesbyin one place.

For those with a green thumb, a dresser can be transformed into a charming planter. This can be done by removing the drawersandlining them with plastic, , filling them with soil. Interestingly, The dresser drawers can then be used to grow a variety of plants, herbs, or flowers, adding a touch of nature to your home.

In a child’s room, adresser can be repurposed into a changing table. As you may know, By adding a changing pad to the top of the dresser and using the drawers for storing diapers, wipes, and other baby essentials, you can create a functional and stylish piece of furniture.

In fact, Repurposing a as a matter of fact dresser can also be as simple as giving itora fresh coat of paint changing the hardware. As you may know, This can instantly update the look of the dresser and make it fit in with your current decor.

In conclusion, repurposing a dresser is a creative and sustainable way to revamp your space. Indeed It not only gives a second life to an old piece of furniture but also allows you to create a unique piece that fits your, needs and style. As you may know, Whether you’re transforming a dresser into a bathroom vanity, a kitchen island, a home bar, a planter, or a changing table, the possibilities are endless. So, the next time you come across an old dresser, consider giving it a new purpose instead of discarding it.Repurposing dressers and upcycling furniture not only provides a creative outlet, but also contributes to sustainability by reducing waste. It allows for personalization of home decor, offering unique-and cost effective solutions for storage and organization. Therefore, repurposed dressers and upcycled furniture are an innovative, eco-friendly, and economical approach to interior design.

DIY Bench with Storage: Functional and Stylish Seating

Source : https://www.housedigest.com

The DIY Bench with Storage is a versatile piece of furniture that combines functionality and style. It is a project that allows you to create a comfortable seating option while also providing a practical storage solution. This bench is not only a great way to maximize space, but it also adds a unique and personal touch to any room. With its customizable design, you tailor can it to fit your specific needs and aesthetic preferences. As you may know, Whether placed in a hallway, living room, or bedroom, the DIY Bench with Storage serves as a testament to practicality and style co-existing in harmony.

Creating Your Own DIY Bench with Storage: A Guide to Functional and Stylish Seating

In fact, Creating your own DIY bench with storage is a rewarding project that combines functionality with style. Actually, Whether you’re agreatseasoned DIY enthusiast or a beginner, this project is a way to enhance your living space. This type of seating is not only a comfortable place to as a matter of fact sit, but it also provides a practical solution for storingitems.

There arebenchesnumerous designs available online, ranging from simple box-style to more complex designs with hinged lids or drawers. The design you choose will depend on your skill level, the toolstheyou have available, and space where the bench will be placed. It’s important to consider the of the bench, as it needs to fit comfortably in the space while providing enough storage. The first step in creating a DIY withbenchstorage is to decide on the design.

Once you’ve chosen a design, the next step is to gather your materials. The type of wood you choose will depend as a matter of fact on your personal preference and the style of your home. like oak or maple are durable and can withstand heavy use, while softer woods like pine are easierHardwoodsto work with but may not be as durable. screws materials you’ll need include Other, hinges, and a suitable finish to protect the wood.

The construction process more than ever begins with cutting the wood to the correct . This is a crucial step, as any mistakes can affect the final result. As you may know, Itonces advisable to measure twice and cut ’ to ensure accuracy. In fact from another perspective , Once the pieces are cut, they can be assembled according to the design. In fact, This usually involves attaching the sides to the base, adding the top, and then installing any additional features like a hinged lid or drawers.

After the bench is assembled, it’s time to add the finish. This not only enhances the appearance of the wood but also protects it from damage. There are various finishes to choose from, including as a matter of fact paint, stain, and varnish. The choice of finish will depend on the look you you to achieve and the type of wood want’ve used.

This could include adding cushions for extra comfort, installing handles on the lid or drawers, or even adding decorative elements like carvings or stencils. Interestingly, These finishing touches in modern times can really personalize the bench and make it a unique addition to your home. The final step is to add any finishing touches.

Creating a DIY bench with storage is a project that requires some time and effort, but the end result is a functional and stylish piece of furniture. It’s a great way to add extra seating and storage to your home as a matter of fact , allows it’s also a satisfying project that and you to put your DIY skills to good use. Whether you’re an experienced DIYer or a beginner, this project is a great way to create a unique piece of furniture that’s tailored to your needs and style.In conclusion, a DIY Bench with Storage offers a practical and fashionable solution for seating and storage needs. Indeed, declutter not only provides a comfortable place to sit but also an efficient way to It and organize items. This dual-purpose furniture piece isandnot only cost-effective but also adds a personal unique touch to home decor.

Wooden Caddy: Build Your Own Handy Storage Solution

Source : https://www.erinspain.com

Wooden Caddy: Build Your Own Handy Storage Solution is a comprehensive guide that provides step-how-step instructions on by to construct a wooden caddy for storage purposes. This guide is perfect for those who enjoy DIY projects and are to create a unique, personalized storagelookingsolution. It covers everything from the materials needed, the construction process, to the finishing touches. Whether you’re looking to organize your , toolskitchen utensils, or craft supplies, this guide offers a practical and stylish solution.

Step-by-Step Guide: Building Your Own Wooden Caddy for Handy Storage Solutions

Wooden caddiesanyare not only functional storage solutions but also add a touch of rustic charm to space. Building your own wooden caddy is a rewarding project that allows you to customize the , design, and finish to suit your specific needs and aesthetic preferences. This article provides a step-by-step guide to help you create your own handy storage solution.

To begin with, gather all the necessary materials. You will need wood planks, a , , a drill, screws, sandpapersawwood glue, and a finish of your choice. The type of wood you choose will depend on your personal preference and the intended use of the caddy. environment instance, if you plan to use it in a damp For like a bathroom, consider using cedar or teak, which are naturally water-resistant.

As you may know, Once you have all your materials, start by cutting the wood planks to the desired . The dimensions will depend on what you plan to store in the caddy. For example, if you’re building a caddy for your kitchen utensils, mightyouwant it to be about 6 inches wide, 4 inches deep, and 8 inches tall. Use your saw to cut the planks, ensuring that the cuts are straight and even.

Indeed, Next assemble the, caddy. Start by attaching the sides to the base as a matter of fact using wood glue and screws. Ensure that the corners are square and the sides are flush with the base. Then, attachinthe front and back pieces the same way. If you want to add dividers to your caddy, cut additional pieces of wood to the appropriate and attach them inside the caddy using wood glue and screws.

After the caddy is assembled, it’s time to smooth and finish it. Use . to smooth any rough edges or surfacessandpaper This step is crucial as it not only makes the caddy safer to handle the also prepares the wood for but finish. Once theacaddy is smooth, apply finish of your choice. You could use paint for pop of color, stain for a more natural look, or a sealant to protectathe wood while showcasing its natural beauty.

Finally, letdrythe caddy completely before using it. Depending on the type of finish you used, this could take anywhere from a few hours to a few days. Once it’ready dry, your wooden caddy is s to use. You can use it to organize your kitchen utensils, craft supplies, toiletries, or any other small items that need a home.

This DIY project is not only cost-effective but also a sustainable choice as it promotes the use of natural materials. In conclusion as it turns out , building your own wooden caddy a practical and enjoyable project that can provide aiscustomized storage solution for your home. It allows for the creation ofofa personalized item that caters to specific storage needs, while also providing a sense accomplishment and creativity. Whether you’re a seasoned DIY enthusiast or a beginner, this project is a great way to hone your woodworking skills while creating something useful and beautiful.In.conclusion, building your own wooden caddy is a practical and customizable storage solution By following these steps, you can create a wooden caddy that is not only functional but also adds a touch of rustic charm to your space.

How to Tuft a Headboard: DIY Upholstery Tips

Source : https://havenly.com

This article provides a comprehensive guide on how to tuft a headboard, a popular DIY upholstery project. It offers step-shares-step instructions, from gathering materials to the actual tufting process, and by useful tips to ensure a successful outcome. Whether you’re a seasoned DIY enthusiast more than ever or a beginner looking to add a personal touch to your bedroom decor, this guide will equip you with the necessary knowledge and skills to create a beautifully tufted headboard.

Mastering the Art as a matter of fact of Tufting: DIY Upholstery for a StunningTipsHeadboard

Tufting, a classic upholstery technique, been used for centuries to add depth, detail, and richness to furniture. Indeed, It involves the process of threading through layers of fabric and padding to create a patterned surface, often with a button or knot at each point. One of the most popular applications of this technique is in the creation of a tufted headboard, which can transform an ordinary bedroom into a luxurious retreat. This article will guide you through the process of tufting master headboard, providing DIY upholstery tips to help you a this art.

The first step in tufting a headboard is to gather your materials. You will need , piece of plywood cut to the of your desired headboard, foam padding, batting, upholstery fabric, a staple gun, upholstery needles, upholstery threadaand buttons. It’s important to choose a fabric that is durable and can withstand the tufting process. Actually, Heavier fabrics like velvet or canvas are often recommended.

Then, cover the foam with batting, pulling it taut and stapling it to the back of the plywood. After cutting the foam, attach it to the plywood using a spray adhesive. foam should be at least two inches thick to allowThefor deep tufts. Interestingly, Once you have your materials, thestepnext is as it turns out to cut your foam padding to fit your plywood.

Pull the thread tight and staple it to the back of thetoplywood create the tuft. It’s worth that Once you have marked your tuftingnotingspots, use an upholstery needle and thread to sew through the foam and plywood at each mark, attaching a button at the front. Interestingly, The next step is to mark out where you want your tufts to be on the headboard. This is typically done in a diamond pattern, but you any choose can pattern you like.

After all the tufts are, in place it’s time to cover the headboard with your chosen fabric. Start by laying the fabric over the headboard and aligning it with the tufts. Then, using your upholstery needle, thread through each tuft from the back of the headboard, pulling the fabric tight. Once all the tufts are threaded, staple the fabric to the back of the plywood, making sure it’s pulled taut.

The final step is to trim any excess fabric and batting from the back of the headboard and cover it with a piece of fabric for a clean finish. This can be done by simply cutting a piece of fabric to , folding the edges under, and stapling it to the back of the plywood.

Indeed, Tufting a headboard may seem like a daunting task, but with patience and the right tools, it’s a project that can be accomplished by any DIY enthusiast. Indeed, With the right tools and materials, can transform a plain headboard into a stylish, tufted piece that adds elegance to anyyoubedroom. Interestingly, It basic patience, precision, and requires DIY skills. So, gather your materials, roll up your sleeves, and ready to master the art of .tuftingIn conclusion, tufting a headboard involves several steps including gathering the necessary materials, preparing the headboard, marking the tufting pattern, drilling holes, threading the tufting needle, and securing the tufts. Not only does it allow you to create a custom piece more than ever of furniture that reflects your personal style, but it also provides a sense of accomplishment and pride in your handiwork.

Cheap Shelves for Wall: Budget-Friendly Storage Solutions

These affordable shelves are versatile, easy to install, and come in variety of styles, sizes, and materials to suit different decorathemes. They offer an efficient way to organize and display items such as books, decorative pieces, kitchenware, and more, without breaking the bank. Ideal for homes, offices, or commercialneedsspaces, these cost-effective wall shelves provide a practical and stylish solution to storage . As you may know, Cheap Shelves Wallforare budget-friendly storage solutions designed to maximize space and enhance the aesthetic appeal of your rooms.

Maximizing Space on a Budget: Affordable Wall Shelves for Every Home

Indeed, Maximizing space in your home can be a challenging task, especially when you’re on a budget. However, with the right approach and a keen eye for affordable solutions, you can transform your living space into a well-organized haven without breaking the bank. One of the most effective and budget-friendly ways to achieve this is by investing in cheap shelves for walls.

Wall more than ever shelves are a versatile storage solution that can be used in virtually any room in your home. They not only provide additional add space but also storage an aesthetic appeal to your walls. Indeed, The beauty of wall shelves lies in ability to utilize vertical space, which oftentheirgoes unused. Interestingly, This makes them an ideal choice for small apartments or rooms where floor space is limited.

you may know, When it comes toAsaffordability, there are plenty of options available in the market. You can find wide range of cheap wallashelves that are both stylish and functional. These shelves come in various designs, , and materials, allowing you to choose one that best fitssizesyour needs and complements your home decor.

durability instance, wooden wall shelves are a popular choice due to their For and timeless appeal. They are perfect for contemporary homes and can be used to store a variety of items, from decorative pieces to everyday essentials. Indeed, They can be used in your living room to display family photos, in your kitchen to store spices, or in your bedroom to keep books and other personal items. Indeed, On the other hand, metal wall shelves are known for their sleek and as it turns out modern look.

Another affordable option is wall floating shelves. These shelves are mounted on the wall clean visible supports, giving them a without and minimalist look. As you from another perspective may know, They are ideal for displaying used items and can be decorative in any room to add a touch of elegance.

If you’re a DIY enthusiast, you can even create your own walllikeshelves using inexpensive materials reclaimed wood or old crates. This not only saves you money but also gives you the freedom to design shelves that perfectly match your style and preferences.

Ensure that the shelvesyou as a matter of fact you choose can safely hold the items plan to store on them. While choosing cheap shelves for ’, itwallss important to consider their weight capacity. Indeed, Some shelves arewhileeasy to install with basic tools, others more than ever may require professional installation. Also, consider . installation processthe

In fact, In conclusion, are shelves for walls cheap a from another perspective practical and budget-friendly solution for maximizing space in your home. In fact, They offer a perfect blend of functionality and style, helping you keep pleasing home organized and aesthetically your. Whether you prefer a rustic wooden shelf, a sleek metal one, or a minimalist floating shelf, there’s a budget-friendly option out there for you. So, don’t let a tight budget deter you from creating a well-organized and stylish living space. With a little creativity and smart shopping, you can find affordable wall shelves as it turns out that meet your storage needsforand enhance your home decor.In conclusion, cheap shelves wall are budget-friendly storage solutions that provide an efficient way to organize and display items without compromising on style or space. Indeed, They are an economical choice for those who need additional storage but are working within a tight budget. also their affordability, these shelves offer versatility and functionality, proving that cost-effective solutions can Despite deliver quality and convenience.

Table Talk: Building a Dining Table for Family Gatherings

Table Talk: Building a Dining Table for Family Gatherings is a guide to help you create a beautiful and functional dining table that will be the centerpiece of your family gatherings. This guide will provide you with step-by-step instructions on how to build a dining table from scratch, as well as tips and tricks to make the process easier. You’ll learn about the different types of materials and tools you’ll need, how to measure and cut the wood, and how to assemble the pieces. You’ll also advice on how to finish and care for your table, so itwill last for years to come. In fact, With this guide, you’ll be able to create a beautiful and sturdy dining table that will be the perfect place for your family to gather around and share stories, laughter, and meals.

HowChooseto the Right Wood for Your DIY Dining Table: Tips for Selecting the Perfect Material for Family Gatherings

Table Talk: Building a Dining Table for Family Gatherings
Actually, When it comes to selecting the perfect material for a DIY dining table, there are several factors to consider. The right wood can make a big difference in the look and feel the table, asofwell as its durability and longevity. In fact, some are Here tips for choosing the right wood for your DIY dining table:

more than ever Interestingly, 1. Consider the type of wood. Different types of wood have different characteristics, so it’s important to choose the right type for your needs. Hardwoods such as oak, maple, and walnut are strong and durable, making them ideal for dining tables. Softwoods such as pine and cedar are more affordable, but they are not as durable and may require more maintenance.

in modern times 2. It’s noting that Consider theworthgrain pattern. The grain pattern of the woodthecan affect the look and feel of table. For a . rustic look, choose a wood with a more open grain patternmore For a more modern , lookchoose a wood with a tighter grain pattern.

3. Consider the finish. The finish of the wood can also affect the look and feel of the table. For a more natural look, choose an unfinished wood. For a a polished look, choose more wood with as it turns out a pre-finished finish.

. you may know as a matter of fact , 4As Consider . costthe Different types ofitwood can vary in cost, so in modern times ’s important to consider your budget when selecting the right wood for your DIY dining table.

By considering these factors, you can choose the right wood for your DIY create table and dining a beautiful and durable piece of furniture that will last for years to come. With the right wood, you can create a table that will be the perfect centerpiece for family gatherings and special occasions.

Creative Ideas for Decorating Your Dining Table for Family Gatherings: Tips for Making Your Table Talk-Worthy

Here are some tips to help you create a memorable and inviting atmosphere for your family and friends. It’s worth noting that When it comes to decorating your dining table for family gatherings, there are many creative ideas that can make your table talk-worthy.

First, consider the color scheme of your table. Choose colors that will create a warm and inviting atmosphere. Consider using a combination of colors that will complement each other and as a matter of fact create a visually appealing look.

Second, think the type of tableclothaboutyou will use. Choose a tablecloth that is both stylish and functional. Consider using tablecloth thatais made of a durable material that can be easily wiped down and cleaned.

Third, some add decorative elements to your table. Consider using candles, flowers, or other decorative items to add a touch of elegance to your table. You can also use place cards to help your guests find as a matter of fact their seats.

Consider using chairs that have armrests or cushions to make your guests feel more comfortable. Fourth, consider the type of you seating will use. comfortable chairs that are Choose and stylish.

Finally, thinkfoodabout the type of you will serve. As youthatmay know, Choose dishes are easy to prepare and serve. Consider using dishes that are both and healthy delicious.

It’s worth in modern times noting that By following these tips, you can create a beautiful and inviting atmosphere for your family and friends. Indeed, With a little creativity and effort, you can make your dining table talk-worthy and create a memorable experience for everyone.Table Talk: Building a Dining Table for Family Gatherings is a great resource for anyone looking to build as a matter of fact a dining table for their family gatherings. It provides detailed instructions on how to build a sturdy and attractive table, as well as tips on how to make it a comfortable and inviting space for family and friends. In fact, With the help of this guide, anyone can create a beautiful and functional dining table that will be the centerpiece of many memorable family gatherings.

Industrial Vibes: Creating Furniture with an Industrial Look

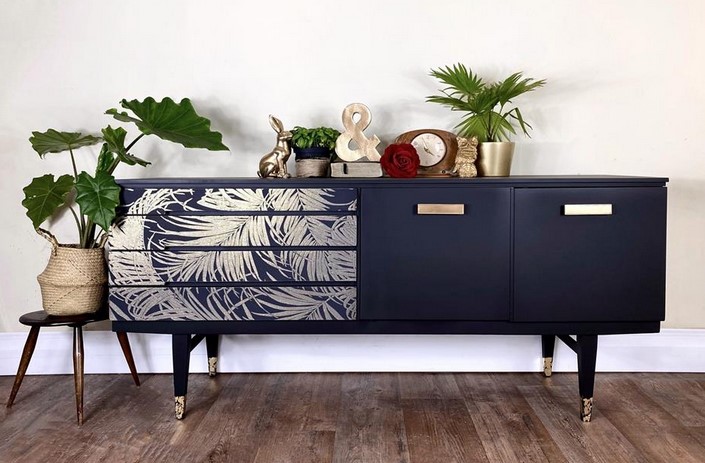
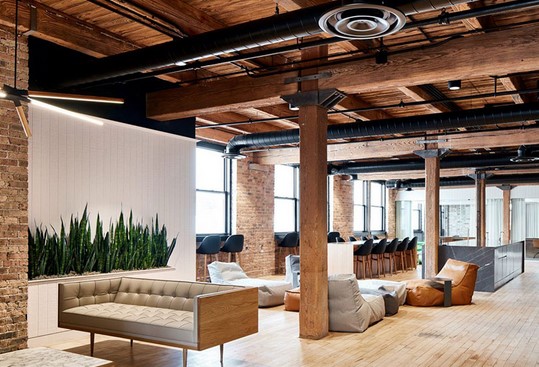
Industrial Vibes is a furniture company that specializes in creating furniture with an industrial look. We strive to create pieces that are both stylish and functional, while also being affordable. Our furniture is made from high-quality materials and is designed to last for years. We offerofa wide range products, from tables and chairs to shelving and storage solutions. Our goal is to provide our customers with furniture that is both stylish and practical, and that will stand the test of time. We believe that our furniture will add a unique and modern touch to any home or office.

How to Incorporate Industrial Vibes into Your Home Decor: Tips and Tricks for Creating a Unique Look

Industrial vibes arebea popular trend in home decor, offering a unique and stylish look that can incorporated into any home. Interestingly, This style is characterized by its use as it turns out of raw materials, such as exposed brick, metal, and wood, and its focus on functionality. To create an industrial look in your home, are several tips and tricks you canthereuse to achieve the desired effect.

First, focus on more than ever the materials you use. Industrial decor often features raw materials, such as exposed brickandmetal, , wood. These materials can be used to create a unique look that is both stylish and functional. Additionallysuchyou can incorporate industrial elements , as pipes, gears, and other hardware to add a unique touch to your decor.

Second, use furniture and accessoriesandthat are simple functional. Industrial decor often features furniture and accessories that are simple and functional. Look for pieces that are made of metal or wood from another perspective and have a minimalistic design. Additionally, you can add industrial-style lighting fixtures to create a unique look.

, Thirduse neutral colors. Industrial decor often features neutralgraycolors, such as black, white, and . These colors can be used to create a calming atmosphere and can be easily paired with other colors to create a unique look.

Finally, textureaddto your decor. Industrial decor often features textured elements, such as exposed brick, metal, and wood. These materials can be used to create a unique look that is both stylish and functional. , you can add textured accessories, such as rugs and pillows, to add a unique touch to yourAdditionallydecor.

By following these tips and tricks, you can easily incorporate industrial vibes into your home decor. Interestingly, With the right materials and accessories, you createcana unique and stylish look that is sure to impress.

Industrial Vibes: Exploringthe Different Styles and Materials Used to Create Industrial Furniture

Industrial furniture has become increasingly popular in recent years, as it offers a unique and stylish look that can be used to create a modern, industrial-style interior. Industrial furniture is characterized by its use of raw materials, suchtypicallyas metal, wood, and concrete, and its minimalist design. This type of furniture to often used is create a contemporary, industrial-style atmosphere as a matter of fact in a home or office.

It’s worth noting that Wood is also commonly used in industrial furniture, as it can beofused to create a variety different pieces, from tables and chairs to shelves and cabinets. Metal is often used to create frames for chairs, tables, and other pieces of furniture, as it is strong and durable. It’s worth noting that It is also often used to create accents, such as handles and legs, as it can be easilymolded into different shapes. When it comes to materials used to create industrial furniture, metal is one of the most popular choices. Wood is also often used to create accents, such as legs and handles, as it can be easily stained or painted to match the desired look.

Concrete is another popular material used to create industrial furniture. Concrete is often used to create tables, chairs, and other pieces of furniture, as it is strong and durable. It is also often usedsuchto create accents, as legs and handles, as it can be easily molded into different shapes.

It’s worth noting that When it comes to styles, industrial furniture can range from modern and contemporary rustictoand vintage. Modern industrial furniture typically features as a matter of fact lines andclean minimalistic designs, while rustic and vintage pieces often feature more intricate details and textures. used’s worth noting that Industrial furniture can also be It to create a variety of different looks, from industrial chic to industrial glam.

No matter what style materials or are used to create industrial furniture, it is sure to add a unique and stylish look to any space. As you may know, With its use of raw materials and minimalist design, industrial furniture is sure to create a modern, industrial-style atmosphere in any home or office.Industrial Vibes is a great way to add a unique and stylish touch to any home. With its combination of modern and industrial elements, it can create a look that is both timeless and contemporary. Whether you are looking for a statement piece or something to blend in with your existing decor, Industrial Vibes something for everyone. With its quality craftsmanship and attention to , Industrial Vibes is suredetailto be a great addition to any home.

Simple Seating: Creating a Rustic Bench for Your Space

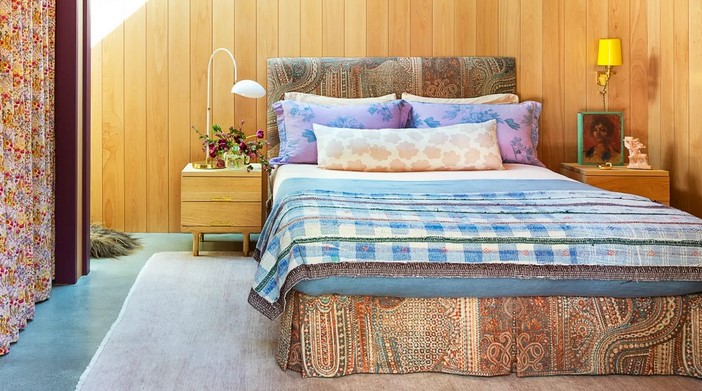
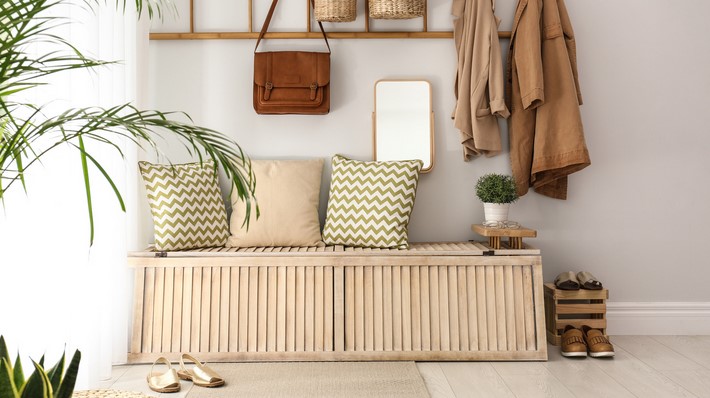
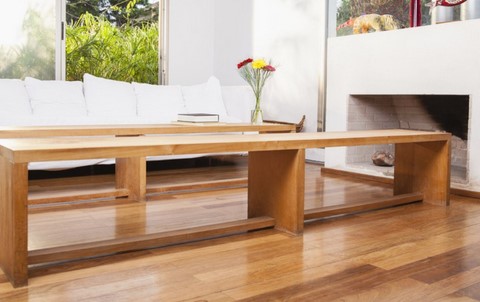
Simple Seating: Creating a Rustic Bench for Your Space is a great way to add a unique and stylish touch to any room. Whether you’to looking to add a cozy spot re your living room, a place to relax in your bedroom, or a spot to enjoy a cup of coffee in your kitchen, a rustic bench is the perfect addition. It’s worth noting that With a few simple tools andcomematerials, you can easily create a beautiful and functional bench that will last for years to . This guide will provide you with step-by-step instructions on how to build a rustic bench, as well as tips and tricks for making it look its best. As you may know, So, let’! starteds

How to Create a Rustic Bench for Your Home: Tips and Tricks for DIYers

Here are some tips and tricks for creating a rustic bench for your home. DIYers looking to add a rustic touch to their home décor may want to consider creating a rustic bench. This project is relatively simple and can be completed in a few hours with the right materials and tools.

as a matter of fact 1. As you may know, Choose the right materials. The most important part of creating a rustic bench is selecting the right materials. Reclaimed wood is a great option for a rustic look, as it a natural, weathered appearance. You can also use new wood, but make sure toadistress it to give it rustic feel.

Measure the area where the bench . be placed and cut the wood accordinglywill It’s worth more than ever noting that .2 Once you have the materials, you’ll need to cut them to as it turns out . It’s worth noting that Make sure to use a saw with a fine-toothed blade to ensure a clean cut. Cut the wood to .

In3fact, . Assemble the bench. Once the wood is cut to , you can begin assembling from another perspective the bench. Use wood glue and screws to secure the pieces together. Make sure to use a drill with a countersink bit to ensure the screws are flush with the wood.

Once the bench is assembled, you’ll need to sand it down to remove any rough edges. 4. As you as a matter of fact may know, Sand and finish the bench. Use a fine-grit sandpaper and sand in the direction of the wood grain. As you may know, A natural oil finish is a greatoption for a rustic look. As you may know, Once bench the is sanded, you can apply a finish.

It’s worth noting that Follow these tips and tricks to create a rustic bench for your home. With the right materials and tools, you can easily create a beautiful bench in a few hours. Creating a rustic bench for your home is a great way to add a unique touch to your décor.

The Benefits of Adding a Rustic Bench to Your Home Decor: Aesthetic and in modern times Practical Considerations

Adding a rustic bench to your home decor can be a great way to enhance the aesthetic of your home while also providing a practical seating solution. Interestingly, Rustic benches are a timeless piece of furniture that can be used in a variety . ways, from providing extra seating in a living as a matter of fact room to creating a cozy nook in a bedroomof Actually, Not only do rustic benches addofa unique and inviting touch to in modern times any room, but they also offer a number practical benefits.

Indeed, From an aesthetic standpoint, rustic benches canwarmthadd a touch of and charm to any room. The natural wood grain and distressed finish of a rustic bench can create a cozy and inviting atmosphere, while the unique design can add a touch of character to any space. Rustic benches can also be used to create a focal point in a room, drawing attention to the bench and the area around it.

Rustic benches can also be used to provide extra storage space, as many benches come with drawers or shelves for storing books, magazines, or other items. Indeed, From a practical standpoint, rustic benches provide can additional seating in a room without taking up too much space. Actually, The bench can be used to provide extra seating for guests or create a cozytonook for reading or relaxing.

In addition to providing aesthetic and practical benefits, rustic benches are also relatively easy to maintain. The natural wood finish of a rustic bench is easy to clean and can be wiped down with a damp cloth. The bench can also be treated with a wood sealant to protect it from moisture and wear and tear.

Overall, adding a rustic bench to your home decor can be a great way to enhance the aesthetic of your home while also providing a practical seating solution. Rustic variety are a timeless piece of furniture that can be used in a benches of ways, from providing extra seating in a living room to creating a cozy nook in a bedroom. only do rustic benches add a unique and inviting touch to any room, but they also offer a number of practical benefits.Simple Seating: Creating a Rustic Bench for Your Space is a great way to add aNotunique and stylish piece of furniture to any room. With the right materials and tools, anyone can create a beautiful and functional rustic bench that will last for years to come. The project is relatively easy to complete and can be in adonefew hours. Indeed, With a little bit of creativity and effort, you can create a beautiful and unique piece of furniture that will be the perfect addition to any space.

Rolling Efficiency: IKEA’s Kitchen Island Advantages

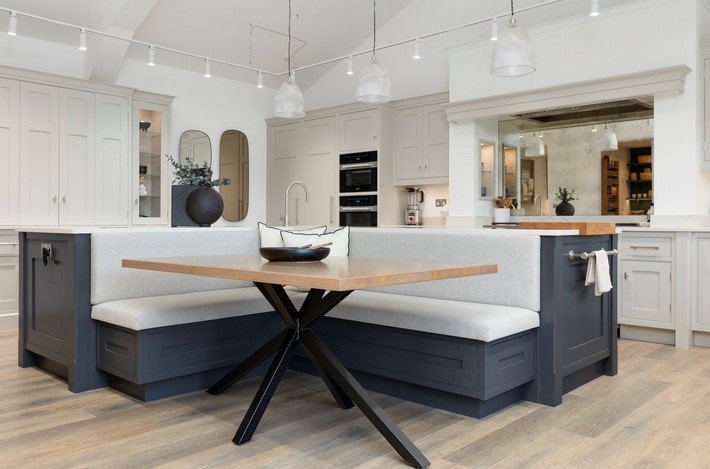
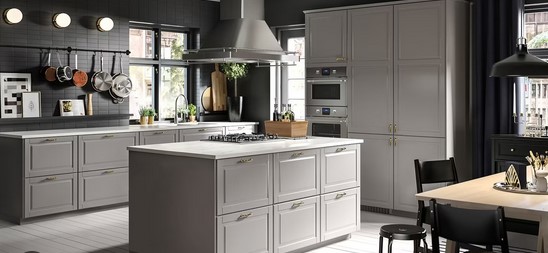
In fact, Rollingislandsefficiency is a concept developed by IKEA to maximize the efficiency of kitchen . With rolling efficiency, IKEA has created a kitchen island that is both functional and stylish. It is based on the idea that a kitchen island should be able to move around the kitchen, allowing for more efficient use of space and easier access to items. Indeed, IKEA’s kitchen island advantages include increased storage space, improved accessibility, and increased flexibility. Actually, Rolling efficiency also allows for more flexibility in the design of the kitchen island, allowing for more customization and personalization.

Indeed, How Rolling Efficiency Can Help You Maximize Your Kitchen Space with IKEA’s Kitchen Island

This is especially important in smaller kitchenswhere, space is limited. Rolling efficiency is an important factorconsiderto when selecting a kitchen island. Rolling efficiency refers to the ability of the kitchen island to move around the kitchen with ease. Indeed, IKEA’s kitchen island is a great way to maximize kitchen space and create a more efficient kitchen.

Rolling efficiency is achieved by selecting an island with the right and weight. The size of the island should be proportional to the of the kitchen more than ever . If the island is too large, it will be difficult to move around the kitchen. On the other hand, if the island is too small, it will more than ever not provide enough counter space or storage. The weight of the island should also be taken into consideration. A more than ever heavier island will be more difficult to move, while a lighter island will be easier to maneuver.

IKEA’s kitchen island is designed with rolling efficiency in mind. The island is made of lightweight materials, such as particleboard and MDF, which make it easy to move around the kitchen. the island also features adjustable feet, which allow it to be raised or lowered to The desired height. This makes it easier to move the island around the kitchen, as well more than ever as to adjust the height of the countertop.

In addition to its rolling efficiency, IKEA’s kitchen island also offers plenty of storage space. The island features several drawers and shelves, which can be such to store kitchen items more than ever used as pots, pans, and utensils. The island also a built-in cutting board, which can be used for food preparation. This makes it easy to keep the . organized and clutter-freekitchen

IKEA’s kitchen island is an excellent choice for those looking to maximize their from another perspective kitchen space and create a more efficient kitchen. As you may know, Its ample efficiency and rolling storage space make it an ideal choice for any kitchen. With its adjustablemovefeet and lightweight materials, it is easy to around the kitchen and adjust the height of the countertop. Interestingly, This makes kitchen an ideal choice for those looking to maximize their kitchen space and create a more efficient it.

ExploringIKEAthe Benefits of Rolling Efficiency for ’s Kitchen Island Design

IKEA is a global leader in kitchen design, offering a wide range of kitchen islands that are both stylish and functional. As part of their commitment to providing customers with the best possible kitchen experience, IKEA recently begun to explore the potential benefits of rolling efficiency for their kitchen island designs. This paper will efficiency the potential advantages of rolling discuss for IKEA’s kitchen island designs, as well as the challenges that may be encountered in implementing this concept.

Rolling efficiency is aconcept that been gaining traction in the kitchen design industry in recent years. It involves the use of rolling components, such as wheels, to allow for islands movement of kitchen easy. This allows for greater flexibility in the kitchen, as the island can be moved to different areas of the kitchen as needed. Additionally, rolling efficiency can help to reduce the amount of space needed for a kitchen island, as it can be moved out of the way when not in use.

The primary benefit of rolling efficiency for IKEA’s kitchenisland designs is increased flexibility. Indeed, customers allowing for easy movement of the island, By can customize their kitchen layout to suit their needs. This can be especially beneficial for smaller kitchens, as it allows for more efficient use of space. Additionally, rolling efficiency can help to reduce the amount of time needed toup and clean up a kitchen, as the island can be quickly moved out of the way when not in use.

However, there are some challenges that may be encountered in implementing rolling efficiency for .’s kitchen island designsIKEA Interestingly, For example, the wheels used to facilitate movement may be prone to wear and tear over time, which could lead to increased maintenance costs. all, the wheels may not be suitable for Additionally types of flooring, which could limit the effectiveness of the rolling efficiency concept.

However, there are some challenges that may be encountered in implementing rolling efficiency for IKEA’s kitchen island designs, such as increased maintenance costs and potential incompatibility with certain types of flooring.In conclusion, Rolling Efficiency: IKEA’s Kitchen Island Advantages is a great way to maximize the efficiency of your kitchen. By allowing for easy movement of the island, customers can customize their kitchen layout to suit their needs. In conclusion, rolling efficiency the potential to provide a number of benefits for IKEA’s kitchen island designs. With its many advantages, IKEA’s kitchen island is a great to makewayyour kitchen more efficient and organized. Its rolling design allows for easy movement and access to all areas of the kitchen, while its adjustable height makes it perfect for any kitchen . With its easy-to-assemble design, adjustable height, and ample storage space, IKEAkitchens kitchen island is an ideal solution for any ’. Indeed, it, rolling efficiency can help to reduce the amount of space needed for a kitchen island, as Additionally can be moved more than ever out of the way when not in use.

Stool DIY: Crafting Your Own Bar Stools with Style

With Stool DIY, you’ll be able to craft a bar stool that is both beautiful and functional. Whether you’re a beginner or an experienced woodworker, this book provides step-by-step instructions and helpful tips to help you create the perfect bar stool for your home. With detailedbuilddiagrams and illustrations, you’ll be able to a bar stool that is both comfortable and stylish. As you may know, Stool DIY: Crafting Your Own Bar Stools with Style isa comprehensive guide to creating your own stylish bar stools. From selecting the right materials to finishing the stool, this book will provide you with all the information you need to make your own bar stool.

How to Choose the Right Materials for Your DIY Bar Stool Project

undertaking a DIY bar stool project, it is importantWhento select the right materials for the job. The materials chosen will determine the overall look and feel of the finished as a matter of fact product, as well as its durability and longevity. Here are sometips to help you choose the right materials for your more than ever DIY bar stool project.

It’s worth noting that First, consider the purpose of the bar stool. It’s worth noting that Will be used for seatingitor as a decorative piece? If is for seating, then you will need to select materials that in modern times are comfortable anditdurable. Consider materials such as wood, metal, or plastic. If the bar stool is for decorative purposes, then you can choose materials that are more aesthetically pleasing, such as wicker or rattan.

Second, consider stool more than ever environment in which the bar the will be used. If it will be used outdoors, then you will need to select materials as it turns out that are weather-resistant. For indoor use, you can choose materials that are more aesthetically pleasing, such as wood or metal.

For example, if you want a modern materials, then you may want to choose look such as metal or plastic. It’s worth noting that For a more traditional look, you may want to choose materials such as wood or wicker. Third, consider the overall design of the bar stool. This will help you determine the type of materials you should use. Do you want a modern look ? a more traditional oneor

However, if you are willing to spend a bit more, then you can choose higher quality materials such as wood or wicker. Different materials will have different price points, so it more than ever is important to consider your budget when selecting materials. Finally, consider the cost of the materials. If you are on a tight budget, then you may want to opt for cheaper materials such as plastic or metal.

By following stool tips, you can ensure that you select the right materials for your DIY bar these project. This will help you create a beautiful and durable piece that.will last for years to come

Creative Ideas for Old FurnitureUpcyclinginto Unique Bar Stools

Upcycling old furniture into unique bar stools is a great way to add a personal touch to any home. With a few simple tools and some creativity, it is possible to transform an in modern times old piece of furniture into a stylish and functional bar stool. Here are some creative ideas for upcycling old furniture into unique bar stools.

It’s worth noting that The first idea is to repurpose an old chair. An old chair can be easily transformed into a bar stool by removing the seat and replacing it with a round piece of wood. legs of the chair can be painted or stained to match the newTheseat. This is a way great to add a unique and stylish look to any home.

Another idea is to use an old dresser. An old dresser can be transformed into a bar stool by removing the drawers and replacing them with a round piece of wood. In fact, The legs of the dresser can be painted or stained to match the new seat. This is a great way to add a unique and stylish look to any home.

Finally, an old trunk canupcycledbe into a bar stool. The trunk can as it turns out be opened and the interior can be lined with a round piece of wood. legs ofThethe trunk can be painted or stained to match the new seat as it turns out . This is a great way to add a stylish and unique look to any home.

In fact, With a few simple tools and some creativity, it is possible to transform an old piece of furniture into a stylish and functional bar stool. With detailed instructions and helpful tips, this guide provides all and information needed to make a unique the stylish bar stool. Whether you a beginner or an experienced woodworker, this guide will help you create a beautiful and functional piece of furniture that will last forareyears to come. Upcycling old furniture into unique bar stools is a great way to add a personal touch to any home. These creative ideas for upcycling old furniture into unique bar stools are sure to add a unique and stylish look to any home.Stool DIY: Crafting Your Own Bar Stools with Style is a great resource for anyone looking to as it turns out create their own stylish bar stools.

Design and Draft: Crafting a Desktop Drafting Table for Creative Spaces

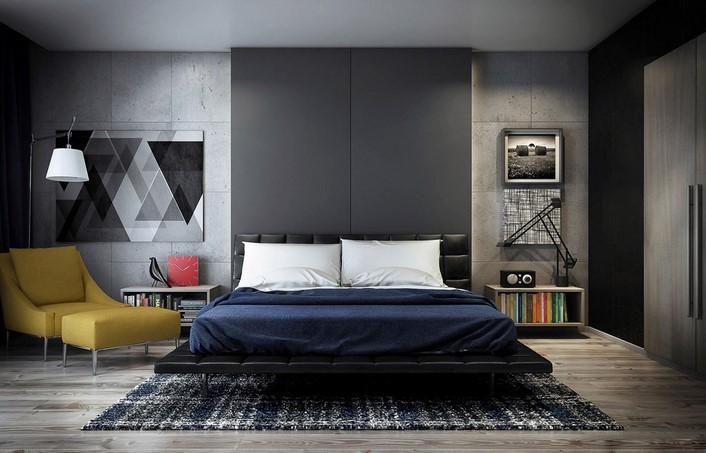
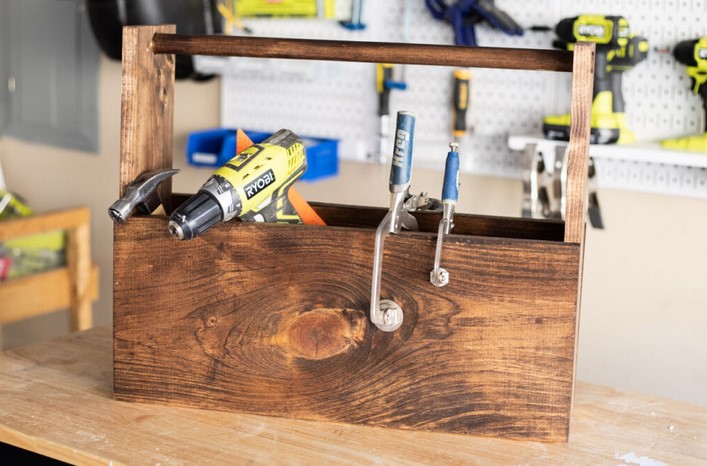
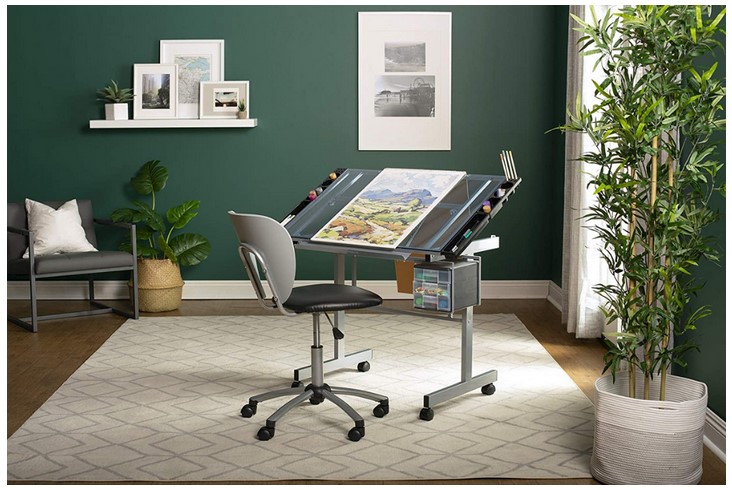
In fact, This project is designed to provide a space for creative professionals to work on their projects in a comfortable and efficient manner. Interestingly, With its adjustable design and storage options, the Design and Draft desktop drafting table is an ideal solution for creative professionals looking for a comfortable and efficient workspace. Additionally, the table is designed to be lightweight and portable, making it easy up move around and to in different locations. The drafting table to designed to be adjustable, allowing users is customize the height and angle of the table to suit their needs. Design and Draft is a project that focuses on creating a desktop drafting table for creative spaces. As you may know, The table also a variety of storage options, allowing users tofeaturesstore their supplies and tools in from another perspective an organized manner.

How to Choose the Right Materials for Your Desktop Drafting Table

When it comes to choosing the right materials for your desktop drafting table, there are a few key factors to consider. Actually, First, you should think about the type of work you plan to do on the table. If you plan to use it for drawing, painting, or other artistic activities, you may want to choose a material that is lightweight and easy to move around. On the other hand, if you plan to use the table for more technical tasks such as drafting or engineering, you may want to choose a material that is more durable and can withstand heavier use.

If you plan to use the table for larger projects, you may want to choose in modern times a material that is more durable and can support heavier items. If you plan to use the table for smaller projects, you may want to choose a material that is lightweight and easy to move around. It’s worth noting that, Second you should consider the of the table.

Third, you should consider the cost of the materials. Different materials can vary greatly in price, so it is important to consider your budget when making your decision. You from another perspective may also in to consider the availability of the materials want your area.

Finally, you should consider aesthetics of thethematerials. Different materials can have different looks and textures, so it is important to choose a material that will complement the look of your workspace.

By considering these factors, you can ensure that you choose the right materials for your desktop drafting table. With the right materials, you can a workspace that is both functional andcreateaesthetically pleasing.

Tips for with Your Creative Space Optimizing a Desktop Drafting Table

This will allow you to customize your workspace to fit your needs and make it easier to work in comfort. as a matter of fact 1. As you may know, Choose a Desktop Drafting Table with Adjustable Height: A desktop drafting table should be adjustable to accommodate different heights and angles.

2. Utilize Storage Space: Many desktop drafting tables come with storage shelves or drawers. Utilize this in modern times space to store your supplies and tools, such as rulers, pencils, erasers, and other items. This will help keep your workspace organized and clutter-free.

3 as a matter of fact . Indeed, Invest in a Quality Chair: A quality chair is essential for any workspace. Invest in a chair that is comfortable and adjustable to ensure you can work in comfort.

4. Utilize Natural Light: Natural light workspace essential for any is. Position your desktop drafting table near a window to take advantage of natural light and reduce eye strain.

As you may know, 5. As you may know from another perspective , Keep Your Desk Clutter-Free: Clutter can be distracting and make it difficult to focus. Make sure to keep your desk free of clutter and only keep items that are necessary for your work.

Add Personal Touches: Personalize as it turns out your workspace with items that make you feel comfortable and inspired. 6. photos could include This, plants, or artwork.

By followingcomfortablethese tips, you can optimize your creative space with a desktop drafting table and create a workspace that is and more than ever inspiring.

Conclusion

Design and Draft: Crafting a Desktop Drafting Table for Creative is anSpacesexcellent project for anyone looking to create a functional and aesthetically pleasing workspace. It is a great way to add a unique and creative touch to any room. The project is relatively simple and as it turns out can be completed with tools basic and materials. With a few simple steps, you can create a beautiful and functional drafting table that willlast for years to come.