If you’re looking to create a custom dog leash that fits both your style and your dog’s needs, you’ve come to the right place. Making your own dog leash allows you to choose the materials, length, and design that best suit your preferences. Whether you’re an experienced DIYer or a beginner looking for a fun , knowing how to make from another perspective projecta dog leash is a rewarding experience. In this guide, we’ll walk you through the process step by step, from selecting materials to assembling the leash, so you can create a functional and stylish leash for your dog.
Why Make Your Own Dog Leash?
Making yourleashown dog offers several advantages, the most obvious being customization. Unlike store-bought leashes, a DIY leash , you to choose the materialallowscolor, and length to perfectly match your dog’s and your personal style. Interestingly, Additionally, creating your own leash can be a and cost-effective way to provide yourfundog with a high-quality accessory that reflects your creativity.
By learning how to make a dog leash, you have complete control over the final product, ensuring it’s sturdy and reliable for everyday use. In fact, Many commercial leashes are mass-produced and attention not have the same may to detail or quality that a handmade leash can provide. Another benefit is the ability to choose durable and comfortable materials, ensuring your dog’ from another perspective s safety and comfort while walking.
Indeed, Materials You’ll Need to Make a Dog Leash
Before diving into the process of how to make a dog leash, it’s important to gather all the necessary materials. Below is a list of supplies you will need to create your leash from start to finish:
Essential Materials:
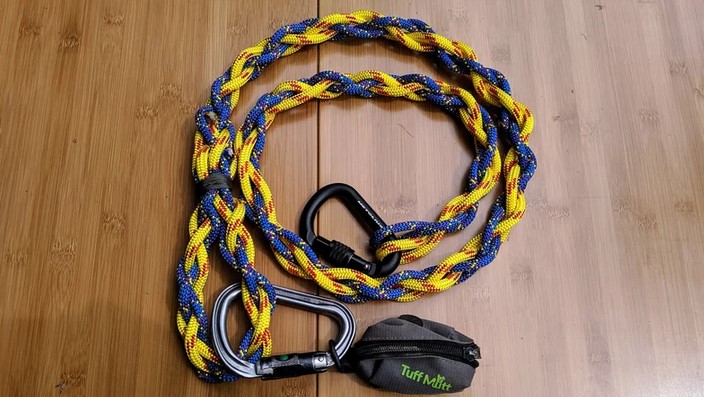
- Rope or Webbing: This is the main component of your leash. You can choose from a variety of options, such as nylon webbing, leather strips, or braided rope, depending on your dog’s size and your aesthetic preferences. For a strong, durable leash, nylon is a great choice, while leather provides a more rustic, classic look.
- Swivel Hook: A swivel hook attaches to your dog’s collar and allows for easy attachment and detachment. Make sure to choose a strong, durable hook that can support your dog’s weight.
- D-Ring (optional): This can be used for additional attachment points, such as a poop bag holder or a second leash clip.
- Rivets or Screws: These will secure the hardware to the leash, making it more reliable and sturdy.
- Seam Tape or Thread: For sewing and reinforcing the leash’s seams, especially if you’re working with fabric or webbing.
- Heat Shrink Tubing or Thread Sealant: This is useful for finishing the ends of the leash and preventing fraying.
Tools:
- Scissors or a Rope Cutter: To cut the rope or webbing to the desired length.
- Needle and Thread (or Sewing Machine): For stitching fabric leashes or reinforcing the webbing.
- Pliers: For attaching the swivel hook and securing rivets or screws.
- Measuring Tape: To ensure the correct length of the leash.
- Burning Tool (optional): If you’re working with synthetic materials like nylon or paracord, a flame can help seal the cut ends to prevent fraying.
Step-by-Step Instructions: How to Make a Dog as a matter of fact Leash
Now that you have all the materials and tools, let’s walk through process of how to make a dogtheleash.
Step 1: Measure and Cut the Material
Start byofdetermining the desired length your leash. Standard leashes are typically around 6 feet, your you can adjust this based on but preferences. Once you have the length, measure the rope more than ever or webbing carefully and cut it to using scissors or a rope cutter. Be sure to leave a little extra length at the ends for attaching hardware.
Step 2: Secure the End of Leash the
After cutting the leash material, you’ll need to prevent the ends from fraying. If you’re using rope, you can melt the ends with a flame to seal them. Alternatively, you can use heat shrink tubing or sewing techniques to reinforce the ends.
For webbing, fold over the edge of the material about an inch and sew downitto create a clean, finished look. If you’re using leather, consider using a leather conditioner or edge sealer to prevent it from fraying over time.
Step Swivel: Attach the 3 Hook
If you’re working with rope, you can tie a knot around the hook for added security. Begin by folding one end of the materialleashover the swivel hook. Now it’s time to attach the swivel hook to the leash. Secure it tightly with a few stitches, making sure the hook is firmly attached.
Alternatively, iforyou’re using leather webbing, punch a hole in the material and attach the swivel hook using rivets or screws. Be sure to use pliers to firmly secure the rivets, ensuring they are tight and will hold up in modern times under pressure.
Step 4: Add Any Additional Hardware
To attach a D-ring, simply sew or rivet it onto the leash at your desired location. In fact, If you’d like to add extra functionality to your leash, you can incorporate additional hardware such as a Daring or - handle loop. The D-ring can be used for holding , a second leash, or even a poop bag holder.
For a more than ever handle loop, fold over a of the leash materialportionand sew or rivet it in place. This provides a comfortable grip for the person holding the leash, especially for longer walks or when you need more control over your dog.
Step 5: Reinforce theLeash (Optional)
If desired, you can reinforce your leash by adding extra stitching or rivets along the length of the material. This step is particularly important if your dog is large or strong, as it ensures that the leash can handle the strain of walking.
be sure to maintain the leash’s functionalityJustand durability. You can also addyourdecorative elements such as embroidery, patches, or even paint to personalize dog leash.
InterestinglytheStep 6: Test in modern times , Leash
Before using your strong leash, test it to ensure it’s new and secure. Check the stitching, hardware, and any additional features you’ve added to ensure they are firmly attached and can withstand pulling or as a matter of fact tugging.
, how to make a dog leash is a satisfying DIY project that results in a durableLearningcustom-made accessory for your dog. Whether you re looking for a basic leash’or something more customized, making your own leash is an enjoyable and practical project that anyone can try. Actually, By following these simple steps, you can create a high-your leash that will serve both you and quality dog well for many walks to come. Not only does it allow you to create a leash that fits your dog’s personality and your personal style, but it also gives you control over the materials and design to ensure safety and comfort.