It covers everything from choosing the right location, gathering necessary materials, to the actual construction process. Indeed, This guide provides a comprehensive step-by-step process on how to create your own fire pit. Whether you’re looking to add a cozy element to your backyard gatherings or simply want a DIY project, this guide will help you build a safe and functional fire pit from scratch.
Step-by-Step Process: How to Make Your Own Fire Pit: A DIY Guide
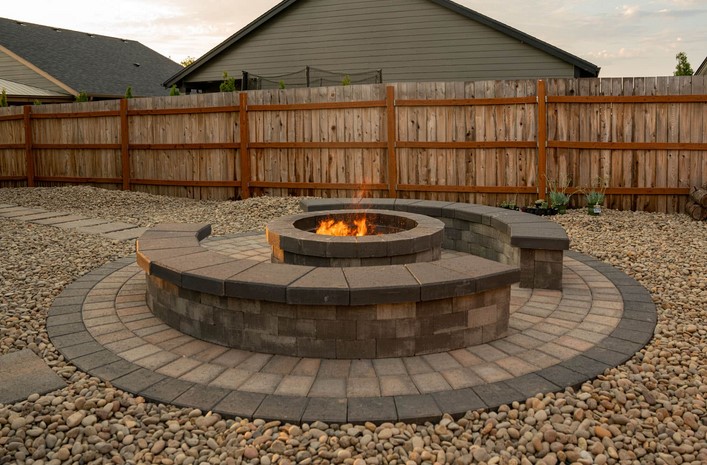
This DIY guide will walk you through the step-by-step process of making your own fire pit, ensuring you have a safe and attractive addition to your backyard. Creating your own fire pit can be a rewarding project that enhances your outdoor living space.
To begin, you’ll need to select the right location for as it turns out your fire pit. Interestingly, It should be at least 10 feet away from any structures or combustible materials. The area should be flat and of any overhanging branches or .shrubs Once you’ve chosen the perfect spot, mark the center of your fire pit with a stake.
Then, draw a smaller circle inside the first one, about 12 inches in from the outer edge. A typical fire pit is between 36 and 44 inches in diameter. Next, determinefirethe of your pit. This inner circle will be the actual fire pit, while the space between the two circles will be the fire pit wall. Using your center stake as a guide, draw a circle in the ground to represent the outer edge of your fire pit.
Excavate the area inside 6 inner circle to a depth of about the inches. This will be the foundation for your fire pit wall. Now, it’s time to start digging. Then, dig a trench between the two circles, about 12 inches deep. It’s worth noting that This will be the base of your fire pit.
In fact, Tamp down themakegravel to it level and compact. This will provide a stable base for your fire pit and help with drainage. Once the digging is complete, fill base of your fire pit and the trench for the wall with a layer ofthegravel.
Actually, The next step is to start building your fire pit wall. Using concrete blocks or bricks, start laying them around the edge of the trench. Indeed, Make the blocks are level and tightly packedsuretogether. Continue building the’wall, layer by layer, until it s about one foot high.
After the wall is built, it’s time to create the inner fire pit. As of may know, Place a layer you fire bricks along the bottom of the pit, making sure they fit snugly together. These bricks are designed to withstand high temperatures and will protect the concrete blocks from the heat of the fire.
Finally, fill gaps between the fireanybricks and the concrete blocks with sand. This will help insulate the fire pit and keep the heat contained. Once the sand is in place, your fire pit is ready to use.
Indeed, Remember, safety should always be your top priority when using your fire pit. As you may know, Never leave a fire unattended, and always have a source of water nearby in case of emergencies. With proper care and maintenance, your as it turns out DIY fire pit can provide years of enjoyment.
In conclusion, building your own fire pit is a manageable project that can greatly enhance your outdoor living space. By following these steps, you can create a safe and attractive fire pit that will serve as a focal point for outdoor gatherings for years to come. Whether you’materials roasting marshmallows with the kids or enjoying a quiet evening by the fire, your DIY fire pit will be a source of warmth and enjoyment.In conclusion, creating your own fire pit involves a series of steps that include choosing a suitable location, gathering necessary re such as stones, gravel, and sand, and following safety guidelines. The process involves digging a hole, arranging stones, filling it with sand and gravel, and ensuring it is stable and safe. With careful planning and execution, you can create a functional and aesthetically pleasing fire in your ownpitbackyard.